Canon EOS 7D MK II
Canon EOS 60D
Canon 100-400mm IS II USM L series lens for wildlife
Canon 24-105mm IS USM L series lens for everyday use
Canon 17-55mm F/2.8 IS USM lens for wide angle landscapes and low light use
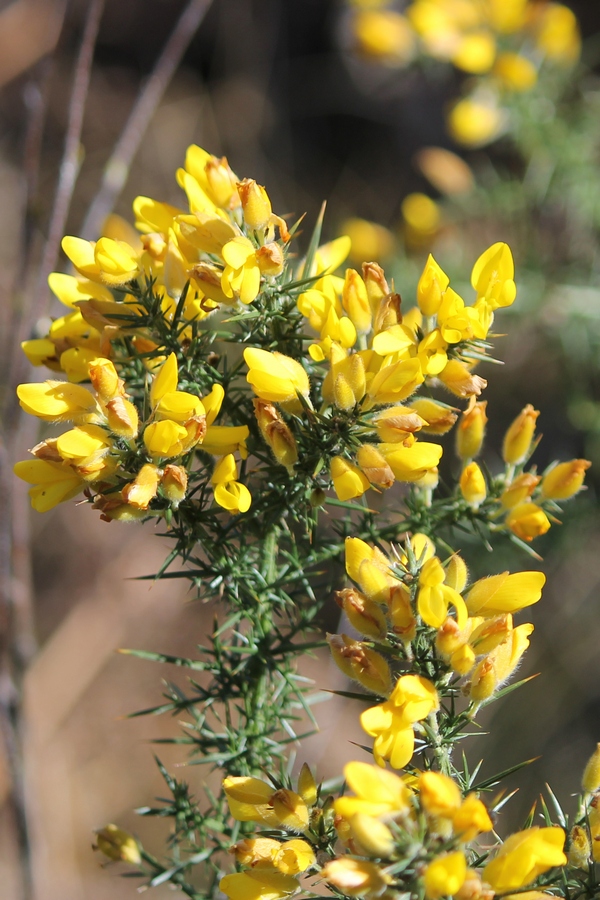
Broom. An aperture f/4 and
a 65mm focal length gives a very shallow DOF (0.034m).
The flower is about 1m from
the camera
Canon 10-18mm F/4.5 IS STM ultra wide angle lens for landscapes
Speedlite flash unit and a 1m chord for off camera flash (OCF) with ETTL metering capability.
Radio transceivers for OCF
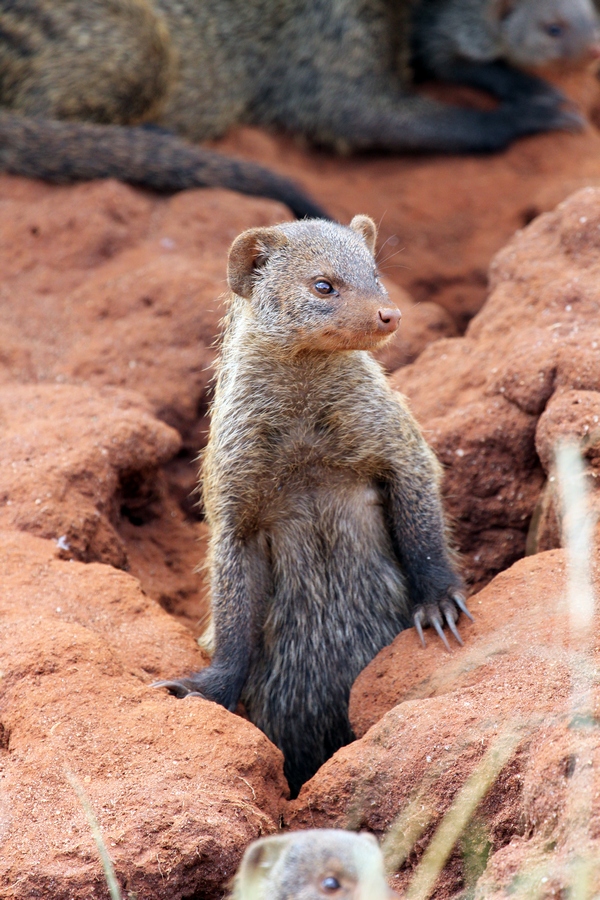
Banded mongoose. An
aperture f/6.3 and a 400mm
focal length gives a very
shallow DOF (0.022m). The
mongoose is about 4m from
the camera
Tripod and cable release for keeping it still
Cokin filters (square) and a holder. Various strengths of graduated neutral density filters are a must for landscape work.
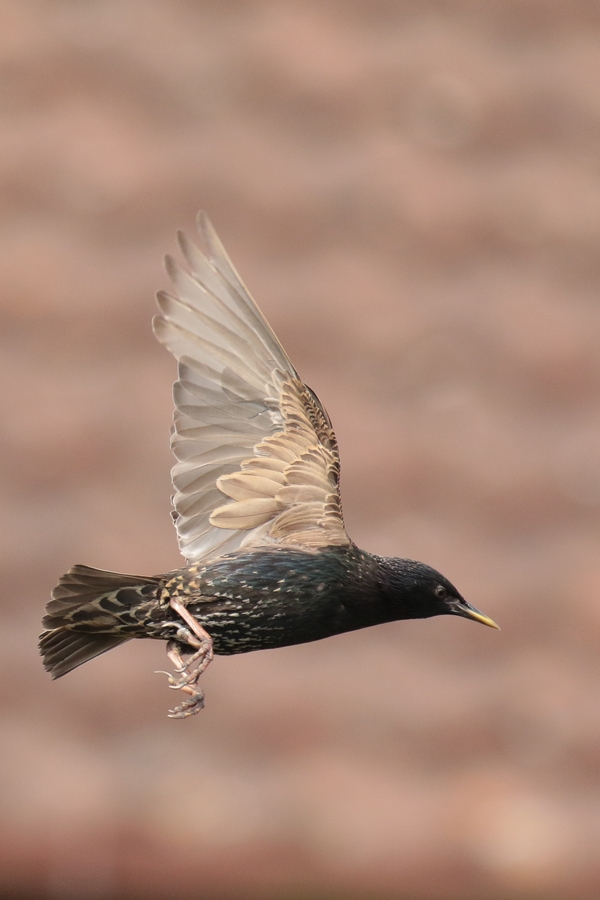
Bright daylight enabled me to
use a shutter speed of 1/3200s
to capture this English starling
in flight. An aperture of f/5.6
and a 400mm focal length and a
distance of about 20m gave a
very blurred background, again
due to shallow DOF (0.267m)
Filters (round screw on), including polarizing, ultra violet and neutral density
Spare batteries and SD Cards
Cleaning cloths and a small blower
LowePro 302 AW camera bag to stash it all in
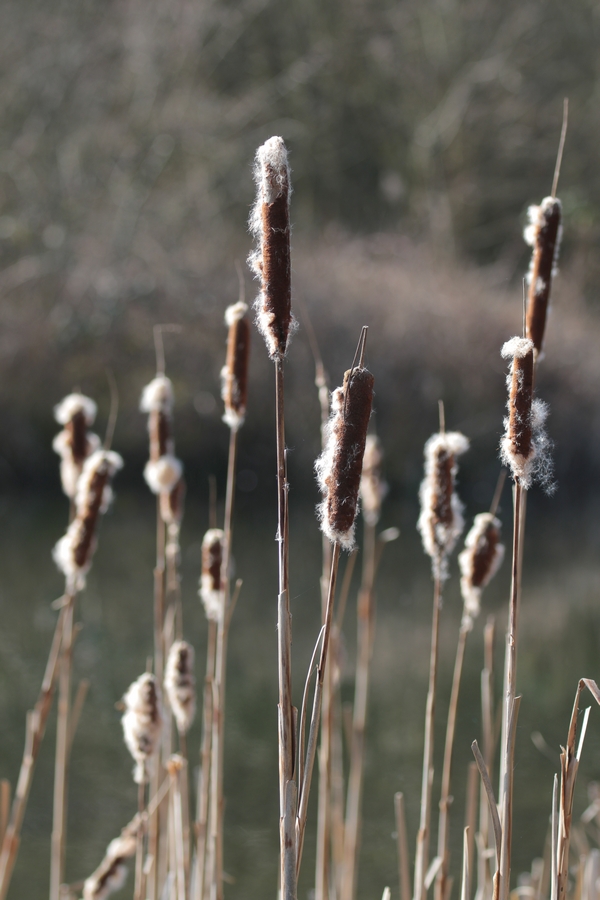
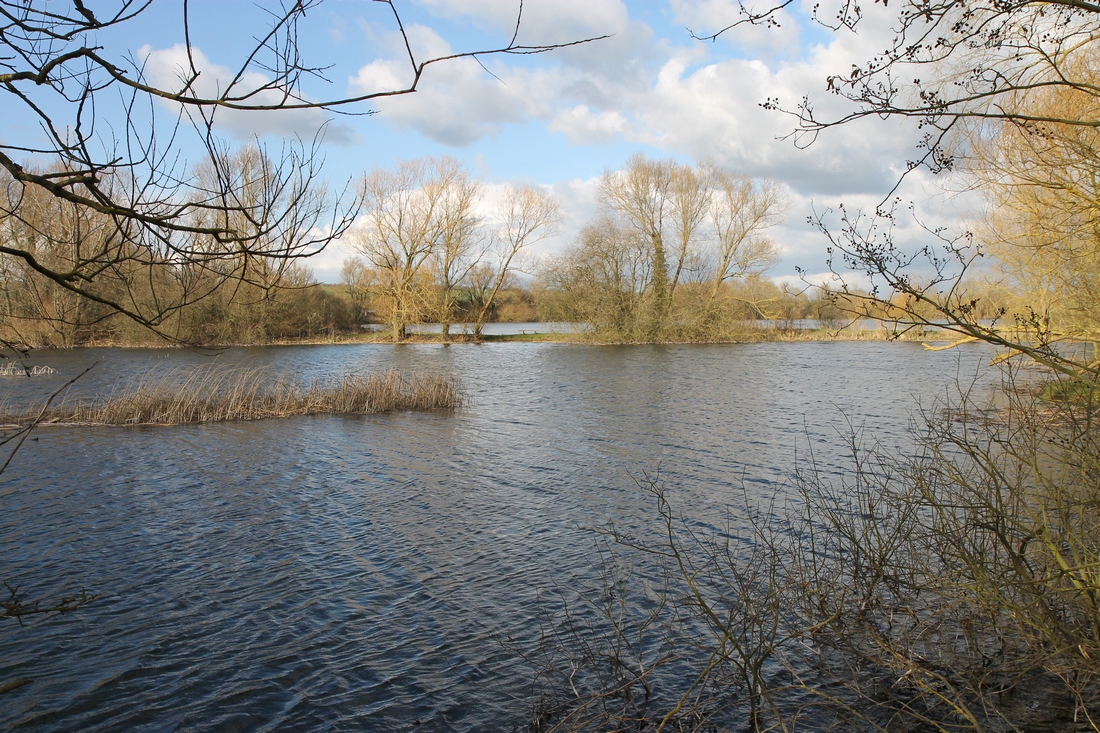
The nearest of the reedmace is in focus but even those a few inches back are becoming blurred. The background is completely hazy - as was desired - but a higher aperture of f16 would have increased the DOF (0.131m to 0.417) enough to make the rest of the reeds in the foreground sharp but still blur the background f/5 @148mm and the reeds were focused at about 6m from the camera
Beware - the bag gets heavy after an hour or so. Often I cut back to the 'bare essentials' depending on what I'm doing
Opteka MCH-25 camera harness. This is a brilliant piece of kit and makes carrying a camera effortless and takes away neck ache
Here I'm focused on the tree to the left at about 30m away as there's no interest in the foreground. I'm at f/5.6 and my lens focal length is 100mm. DOF is 21.5m and everything from 23m to 44m is in focus
Small HD video camera with a monopod to hold it on, even in the Vehicle. It's extremely difficult to hold it steady with your arms outstretched
The video has a wind suppressor on the microphone
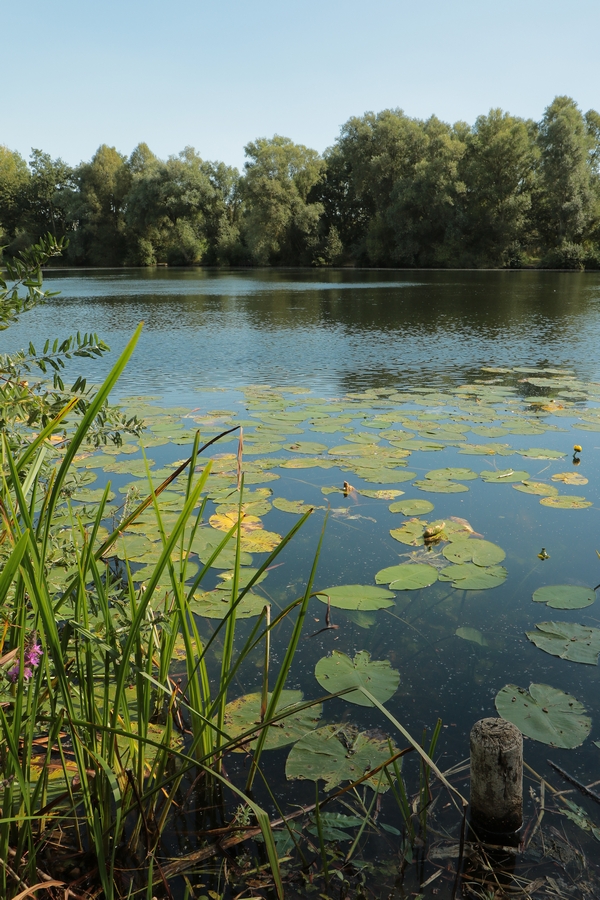
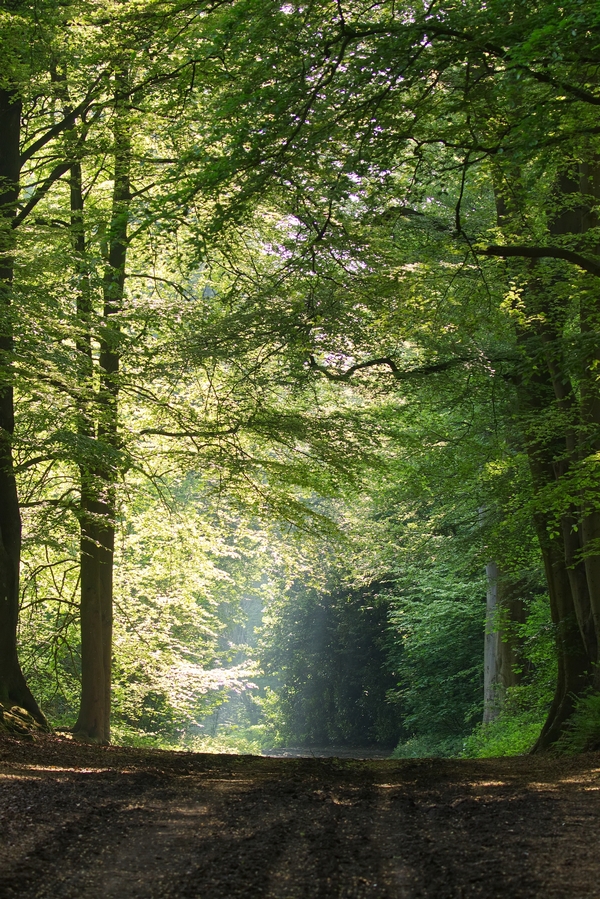
Front to back focus. A small aperure of f/11 and focal length of 18mm make this easy. I'm focused on the lillies about 4m out. Everything from 1m to infinity is acceptably sharp
The number three problem, is getting the photo to reflect your intention as a photographer. Once you have got the photography basics sorted you have decisions to make. Do you want a sweeping 'environmental' composition showing your subject in its surroundings or perhaps you'd prefer a 'stand out' closeup with the surroundings relegated to a blurry colourwash.
Your lens aperture is the creative tool you need to master for this.
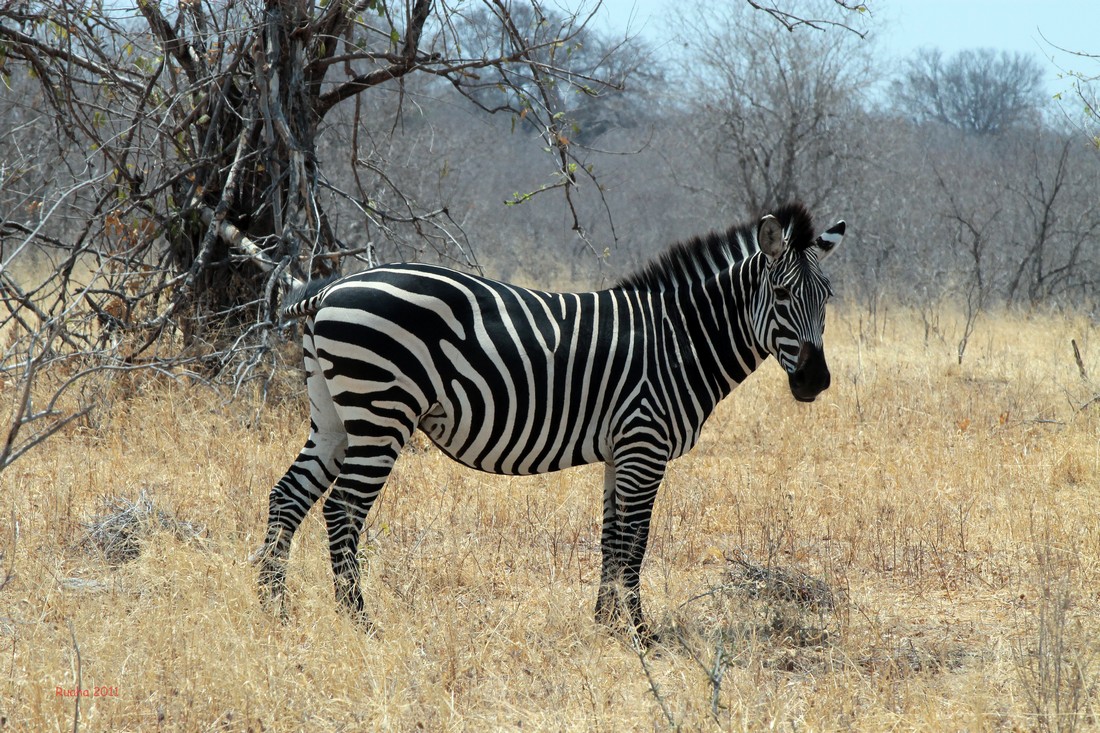
Plains zebra about 20m away. The photo
was taken at a fairly small aperture (f/14)
giving me a depth of field from 18-23m.
The far background starts to blur a little
but it was ok for this shot. Because of the
long focal length (208mm) there was no
chance of front to back focus
Aperture
The aperture is equivalent of the iris in your eye. In low light it needs to be wider to let enough light in for the retina to register it properly. So in the camera in this situation the lens aperture is opened up wider to let more light onto the sensor. In bright light the aperture is generally much smaller to allow the equivalent amount of light onto the sensor in a given time.
Aperture is a ratio which is measured in 'f stops' as:
Widest 1.4, 2, 2.8, 4, 5.6, 8, 11, 16, 22 Smallest
In camera terms each 'stop' of the lens will either halve or double the light depending depending on whether you are opening or closing the lens aperture. (This is assuming the shutter speed is constant).
The numbers seem odd but are due the fact that light drops off proportionaly to the square of the distance it travels so if you take each number in the sequence and multiply it by the square root of two (1.414) you will get the next number which equates to halving the light.
Shutter Speed
Shutter speed is the time based regulator of how much light hits your sensor.
Shutter speed is measured in seconds from:
Slowest 1/8, 1/15, 1/30, 1/60, 1/125, 1/250, 1/500, 1/1000 Fastest.

A Fast shutter speed of 1/250s is used to
stop the action. Aperture of f/16 and a
lens focal length of 48mm make it easy to
get everything sharp right to the horizon
when I focus on the rock about 15m in
front of me
But, if you double the shutter speed ie. 1/125th of a second to 1/250th of a second this will halve the amount of light hitting the sensor, or double it if you go the other way, since the speed of light is constant (You can get much fuller explanations elsewhere).
Exposure
Variable apertures and shutter speeds give you lots of flexibility to take a correctly exposed and well focused photo. ie. 1/125s at f/11 is the same as 1/250s at f/8 because in the second example you have opened up the camera by 1 stop to let twice as much light through a bigger hole, but halved the the amount of time the shutter is open ie. doubled its speed, which haves the amount of light passing through. Net result - both exposures let the same amount of light onto the sensor.
Aperture Priority

I'm in Aperture priority mode set to f/10.
I want a good depth of field to infinity but
am not too bothered about the near
foreground as there's little of interest.
I'm using a 55mm focal length lens and am
focused on the nearest buffalo at about
30m away. That gives me acceptable focus
from 10m to infinity
In aperture priority mode you are in control of the aperture setting. Once set, the camera will take a reading of the light entering the lens and then automatically adjust the shutter speed to make sure the right amount of light for a correct exposure is hitting the sensor. This is quicker than having to adjust both (assuming ISO is fixed) and enables you to decide things like how much depth of field you want. As the light changes the camera will adjust the shutter speed to compensate.
Shutter Priority
This is more or less the opposite of the last situation. You are in control of the shutter speed and the camera adjusts the aperture accordingly to get a good exposure. When you must catch high speed action this is the go to mode.
Manual Exposure
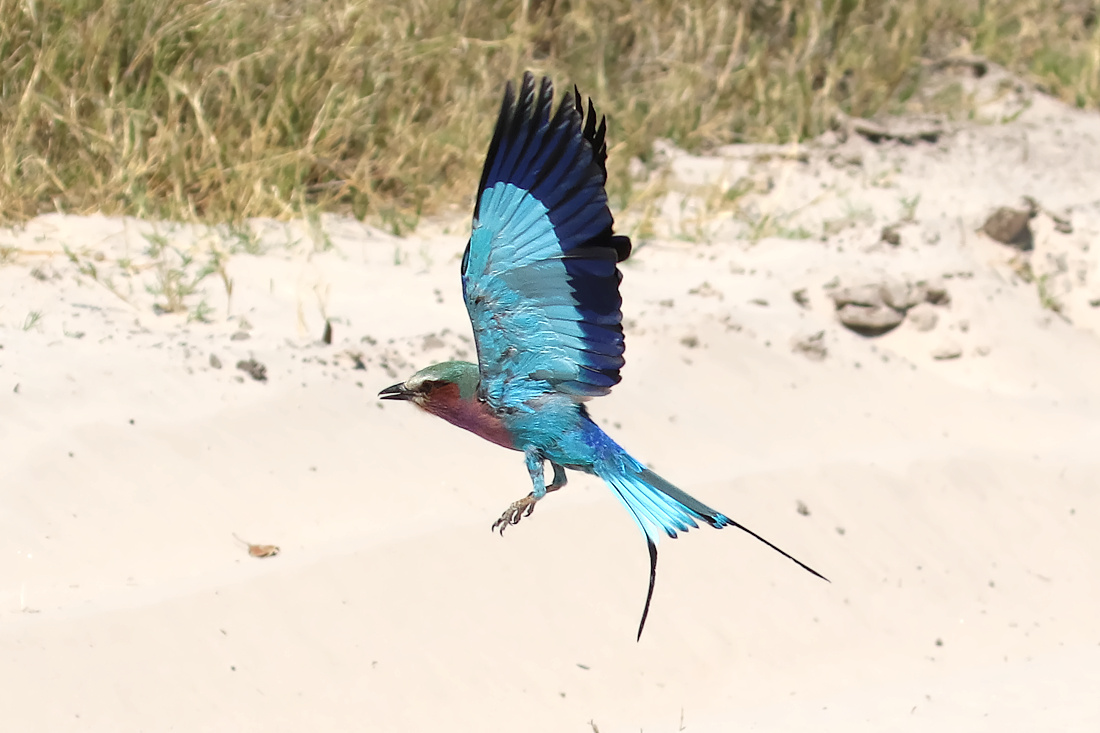
I knew I'd need a high speed shutter to
catch this lilac-breasted roller as is darted
down. So I put the camera into shutter
priority mode set to 1/4000s and waited. I
fired off a burst of about 10 frames to boost
my chances of getting a good shot. DOF was
of no concern. The camera set the aperture
to f/6.3 and I was happy with that
In this type of exposure you are in full control of both aperture and shutter speed. The camera is not automatically adjusting one or other to balance the light input so that the image is correctly exposed. For instance if you increased your shutter speed from 1/125 to 1/250s the camera will not open up the aperture by 1 stop of light. If it was at f/11 it will leave it at f/11 and your image would be 1 stop underexposed (assuming you do not have the ISO set to Auto.) It's up to you to compensate or not. You are free to do as you will to achieve whatever looks best to you.
So what happens if the ISO is set to Auto?
In this case the camera has something to control and so it looks at your manual settings and calculates how much it needs to increase or decrease the ISO by to result in what it believes is the right exposure. It's a good setting as to a large degree you can mess with aperture and shutter speeds and know that the end result will be reasonably exposed. What will vary is the amount of noise in the image. There's always a catch!
Exposure Compensation
The camera is really an idiot following internal rules of thumb for exposure. When you are using evaluative metering it looks at the whole picture and comes up with a nice average sort of exposure. Most of the time it's not bad but some circumstances fool it. Snow for instance causes it to want to darken the image, and shady locations make it want it to lighten everything.
If you have a subject in bright light but a dark background it may try to lighten the scene and overexpose the bit you want to be just right. It has no knowledge of what the scene is and that's where you come in. You may have to manually override the light metering - but do this by referencing the histogram, not the screen on the back of the camera as this can be a lot different to the actual image. The screen might look fine but since you can set the brightness on the screen it may not be the same as the sensor is seeing it.
Sometimes you may just decide that the image would look a bit better for being a little lighter or darker. You can manually tweak the exposure by turning one of the dials on the camera to add or subtract an offset to the metered exposure, until it looks how you would like it to.
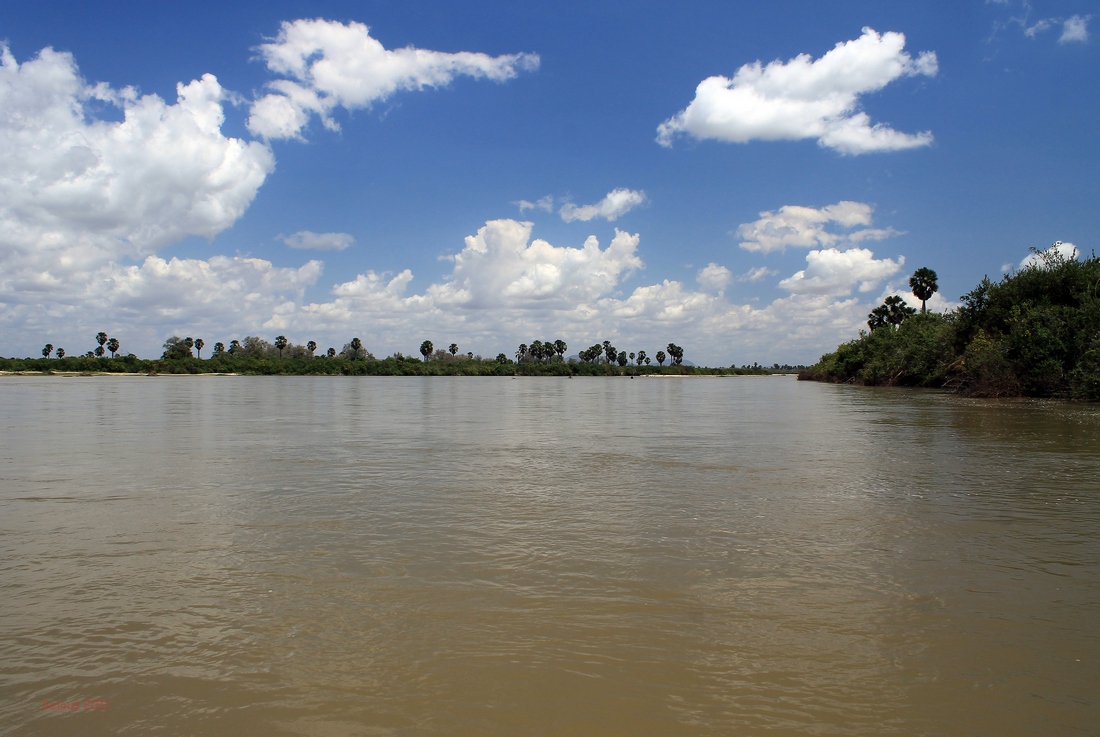
The Rufiji river. Using a medium aperture
of f/10 to keep a reasonably quick shutter
speed when using a polarising filter was no
problem, as the focal length of the lens was
only 18mm and this gave us more than
enough scope to get a huge DOF at any
focus distance over just under 2m
Depth of Field
So why bother varying apertures and shutter speeds?
Well one good reason is what's called 'depth of field' (DOF) which means how much of your picture, from front to back, is in focus. Simple physics dictates that the light focusing on a sensor through a small hole (aperture) will result in much more of the front to back being in focus (DOF) than light going through a large aperture.
In other words, aperture controls depth of field so if you control aperture it allows you to control the depth of field in a creative manner.
Shutter speed doesn't affect DOF but the focal length of the lens, the aperture and the focused distance to the subject are the three parameters that will. Aperture is your best tool for influencing DOF.
So, if you absolutely must have everything in focus from 2m to infinity then it is easiest to set your aperture quite small ie. f/16 and combine it with as short a focal length lens as you can get away with and still make the shot, providing you aren't using an unsuitable lens ie. 400mm. The downside of this is that the smaller aperture will mean that the shutter will be open longer and so any movement may cause blur in the photo.
What this is saying is that the shorter the focal length of the lens the easier it is to get a huge DOF and you do not need to stop down the lens as much to get the desired result.
Remember smaller numbers mean wider apertures. The numbers in the example above are given for DSLRs with cropped sensors. If you have a full frame camera the numbers will be slightly different but the principle is the same.
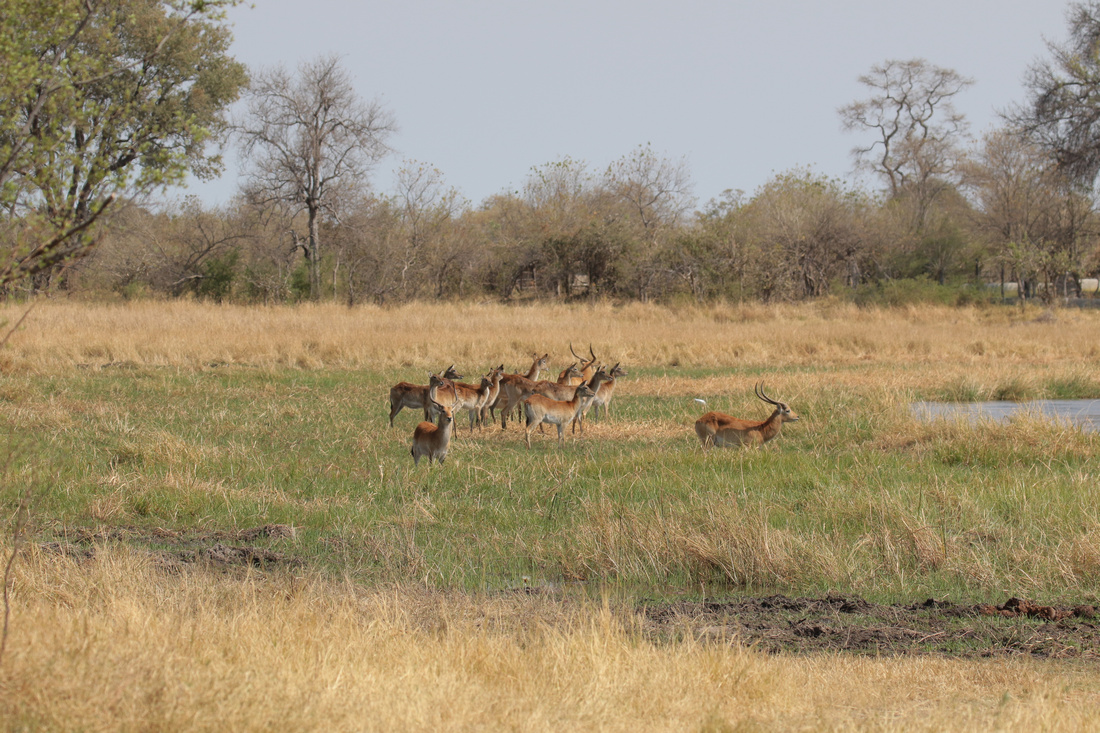
In this photo the aperture is set to f/8 and
I am focused on the lechwes at about 40m
with a focal length of 153m. The background
goes a little bit blurry because the depth of
field is 22m (everything from 32m to 54m
from the lens) and the tree line is well
beyond this
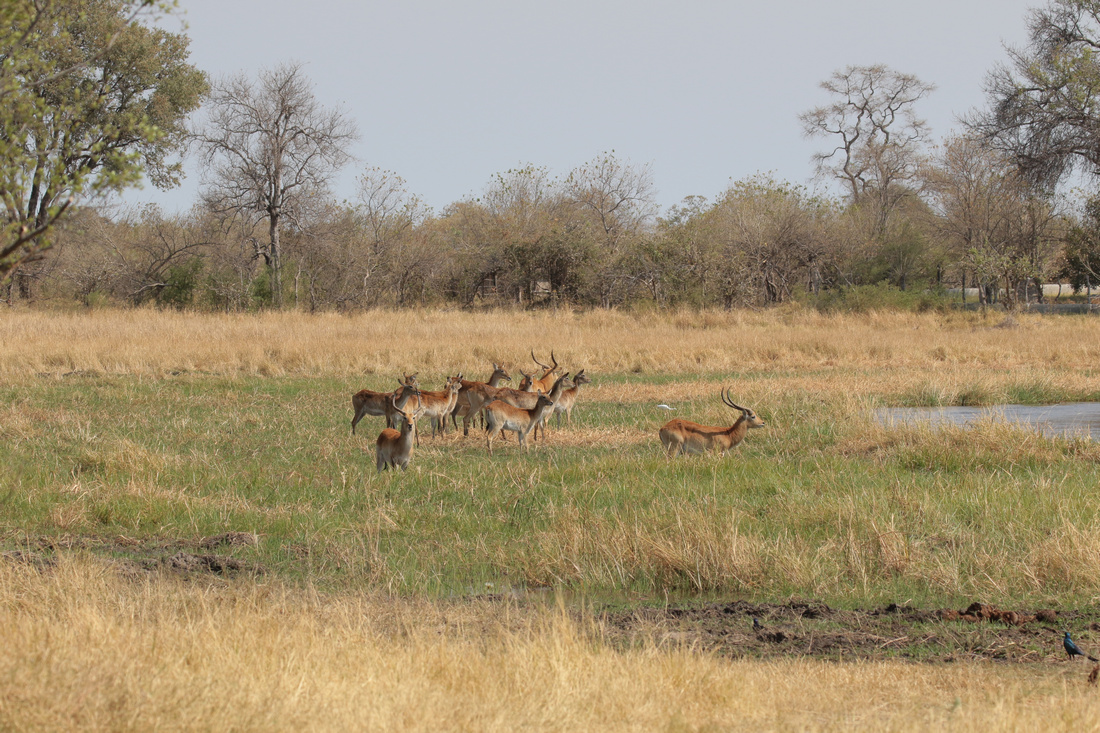
In this frame I have adjusted the aperture
by 2/3 stops to f/10 to increase my depth
of field. The depth of field is now 30m
(everything from 30m to 60m in front of the
lens) which is a little closer to the tree line
and so it's less out of focus. An aperture of
f/20 would have given me a DOF of 94m
In the pictures opposite the background is more blurry in one than the other. Look at full size and you will see a noticeable difference. This is because I changed the aperture a little between shots to increase my depth of field to be sure of getting the lechwes in focus.
If there's nothing within 10m or so of the camera that needs to be in focus then you could go for a much wider aperture (because you are not trying to get quite so much front to back focus) and hence, following the rules of aperture and shutter speed above, a much quicker shutter speed to get the same amount of light through the lens. Much better if you are trying to get a crisp shot of some action.
Also it is important to try and reduce the effects of camera shake while hand holding the camera, and the longer the telephoto lens the more this shows up, so the quicker shutter speed will help to reduce camera shake. Note though that camera shake is best reduced by resting the camera on something solid or mounting it on a tripod. For freezing the action, read on below.
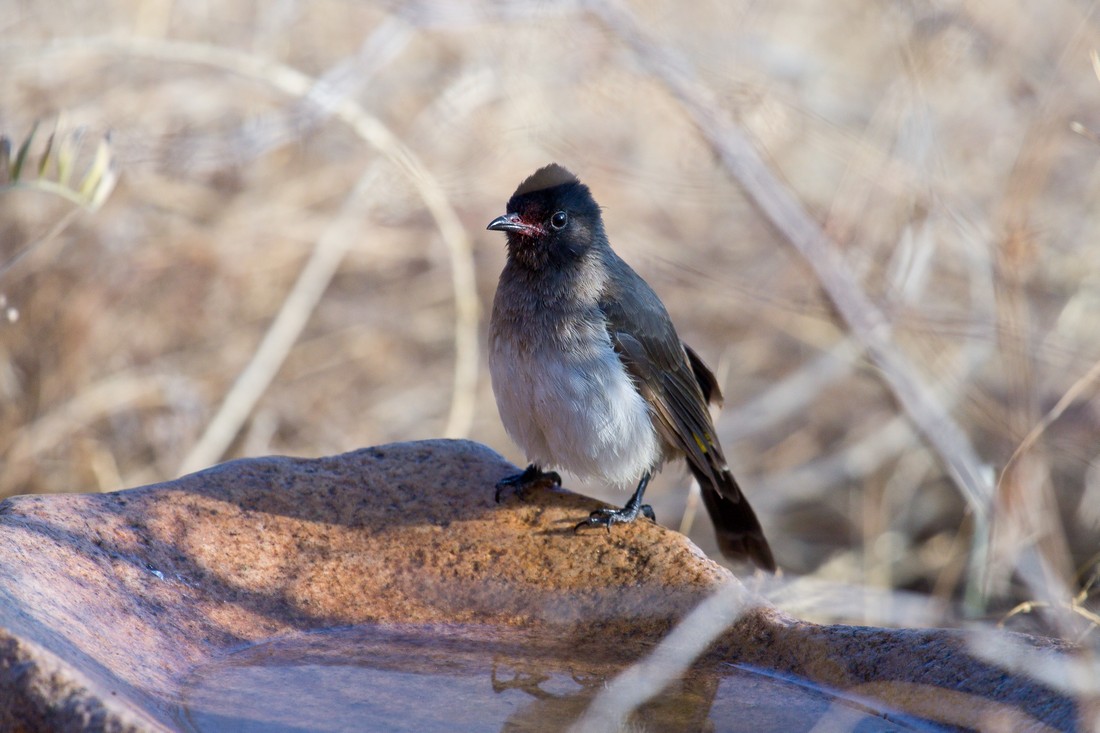
Common Bulbul. Aperture f/5.6 and a
400mm focal length will give a very shallow
DOF (0.031m) making the bird stand out
from the blurred background grasses. The
distance was about 5m away
Poor Light
A second reason for varying shutter and aperture speeds is that in poor light, even with a slow shutter speed the sensor may struggle to get enough light on it to register an image. The wider you make the aperture, the more light gets through to the sensor in any given time, so your chances of a good photo are improved.
Blur the Background
A third reason, if you want your subject to really stand out from the background you can do this by arranging a; good separation distance from the background, and then b; getting as close as reasonable to the subject and c; set as wide an aperture as your lens will go to, with the aim of having a very shallow DOF. Focusing on a subject at a short distance is important for this to work well. The result should be a lovely sharp subject jumping out from a very blurry background.
This is the classic technique in many wildlife shots. It also works quite well with telephoto lenses, as due to the long focal length of the lens they will usually have a much shallower DOF for any given setting anyway.
There is however a danger of having too shallow a depth of field with low apertures in that only part of the subject will be in focus, and you may want all of it to be sharp, in which case you would need to 'stop down' your lens ie. f/4 to f/8.
If you put your camera in aperture priority mode then all you have to do is manually set the aperture and the camera will figure out the Shutter speed for you.
With a 18mm lens set to f/8 and focused
only 3m into the shot - which is close to the
hyperfocal distance of 2.15m - we ensure
that everything from the branches in the
foreground right out to the far distance is
reasonably sharp
Focal Length and Focusing Distance
One thing that massively affects DOF for any given settings is the focal length of the lens (as opposed to the focusing distance to the subject). The shorter the lens the easier it is to get a large depth of field. ie. a 17mm lens will give much greater DOF than a 50mm lens at the same aperture setting and focusing distance.
The distance into the shot that you focus, combined with the focal length of your lens, affects what will and won't be in focus in the end result. A shorter lens will generally give a deeper depth of field at any given focusing distance.
Here we have the perfect front to back in
focus scenario. The camera was set at F/18
with a focal length of 24mm. After checking
hyperfocal distance tables I focused on the
roadside plants about 3.5m in front of me and
ensured everything from about 1.5m to infinity
was reasonably in focus
The real secret of how to get maximum DOF is to use the hyperfocal distances of the focal length/aperture as your starter. The hyperfocal distance for a given set of parameters is the minimum distance into the shot that you can focus on and still get everything in focus all the way out to infinity. Also everything from the Hyperfocal distance up to half way back to your camera will be in acceptable focus as well. These are fixed numbers and so you can easily learn the common ones or follow this link to view or print out a small table to use as reference.
One way to make more sense of all my tips is to download one of the many phone apps that deal with DOF calculations or hyperfocal distances. You can plug in the aperture and focal length of a lens and also the distance that your subject is at, and it will
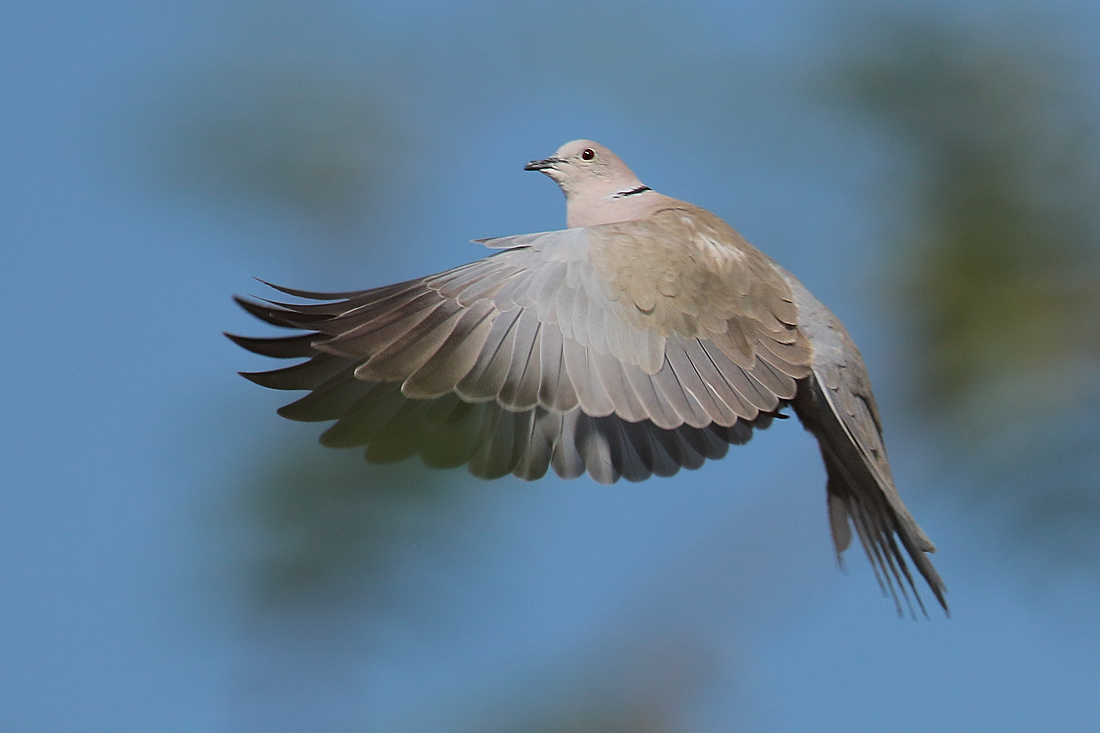
Shutter 1/1600s to freeze the action and
aperture at f/7.1 to slightly increase the
DOF which helps my chances of a sharp
image. Because of the bright sky I am using
partial metering (the inner 10% of the
image) to get the exposure of the dove
correct and not too dark which would
happen if I exposed for the sky.
magically show you the nearest and farthest distances that will be in focus. ie. using a fixed 50mm lens at f/11 and subject (focus) distance of 10m. everything from 5.4m to 69m will be in focus.
With the same focal length and aperture but with the lens focused 30m away everything from 8.4m to infinity is in acceptable focus, and so on.
Sit and play with the app instead of watching TV and eventually you will get a feel for what settings will be needed for a given shot. This will save you much heartache and significantly boost your 'keeper rate'.
Having said that, remember this is a starting point and isn't always the perfect solution. In many cases, focusing on a distant subject will work pretty well without the need for performing calculations in your head. Or if there is a definite subject somewhere in your compstion, I'd tend to focus on that anyway.
Freezing the Action
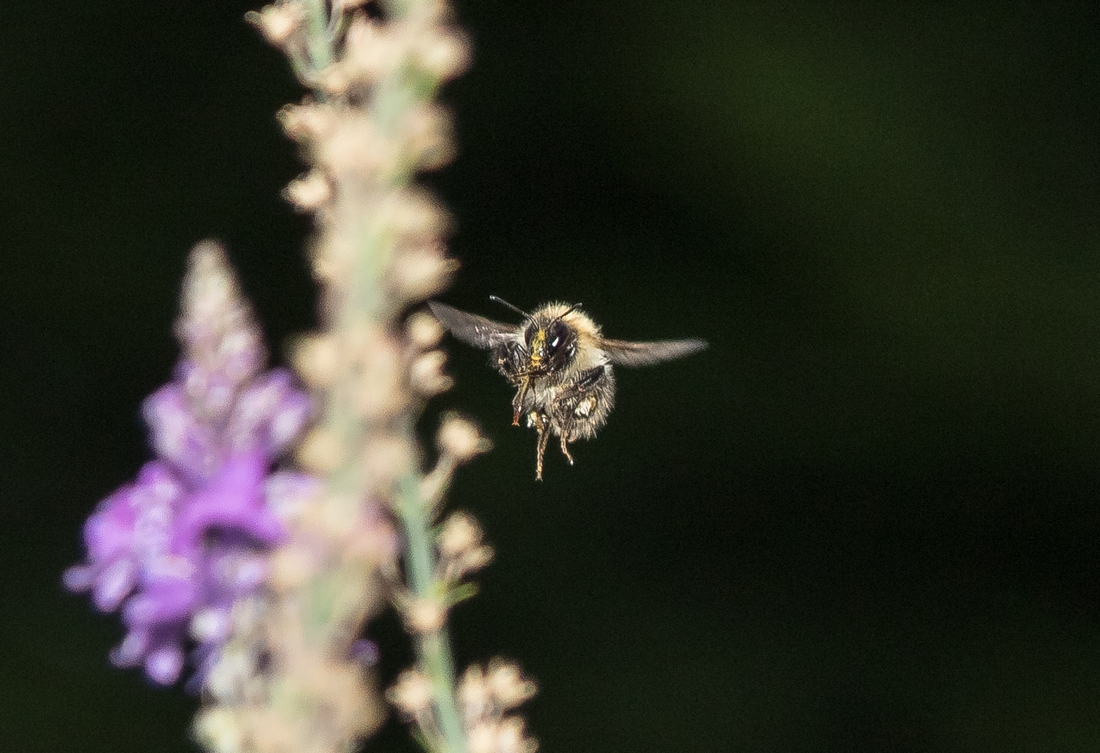
Shutter 1/8000s and focal length of 84mm.
The aperture has opened up to f/4 to let
more light in. This has almost frozen the
bee's wings, but the effect of the large
aperture is to very much reduce the depth
of field so that only the bee is in focus.
However this makes it stand out more for
a pleasing shot.
Sometimes you want to capture fast action and are not concerned with depth of field. In this case you use a higher shutter speed to capture a smaller slice of time and so reduce the effects of motion blur to as near as possible to zero.
In order to expose properly with a faster shutter speed (shutter is open for less time) the camera compensates by opening the aperture to let more light through in the smaller time frame.
The limit is reached when the aperture is fully open but the shot becomes underexposed as the shutter speed continues to be increased and not enough light is hitting the sensor.
You then have one other trick in your bag. And that is to vary the ISO setting for the camera sensor. This will enable you to increase the sensisivity of the camera sensor so that less total light is needed to facilitate a correct exposure. The downside of this is increased noise, or grain in the picture so in effect it will not apear quite so sharp.