You can find much more technical articles on the internet so this page is not meant to compete with them. It's just some of the techniques that I have found to be of practical use, without going into 'in depth' explanations of the theory behind them.
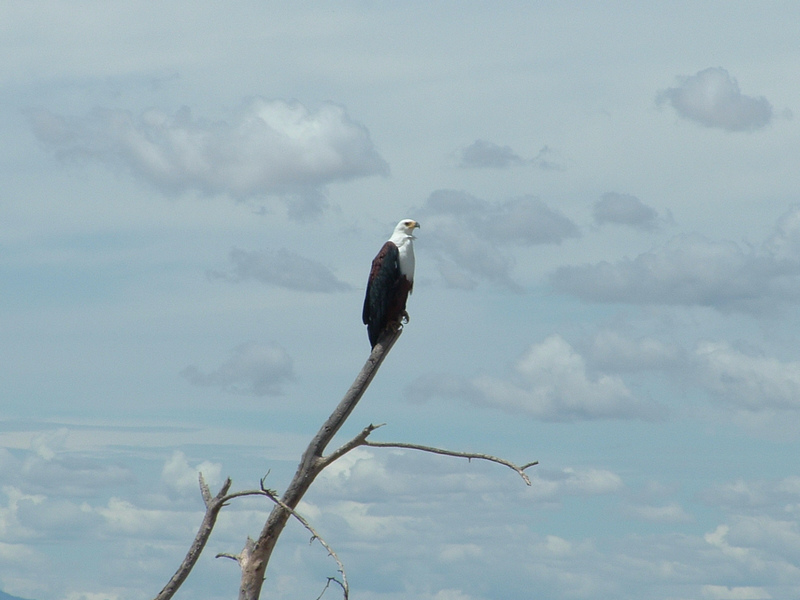
Fish eagle in Amboseli
A camera is only as good as the light that comes through the Lens. What I'm getting at is that it's worth spending more money on a good lens. You can change cameras every couple of years but a lens will go on and on. The one golden rule I have when buying a lens is - make sure it's image stabilized, (or has vibration reduction built in), the term depends on the manufacturer. This really helps in avoiding focus problems.
When you are out and about looking for those great landscape shots, carry a lightweight tripod, or even a monopod if you are finding weight to be an issue.
Also, don't be without a couple of filters; I'd say the most often used are the Polarizing and UV filters, and ND filters are essential for those misty-waterfall shots. And don't forget a cleaner cloth. It's surprising how often a lens gets water or dust on it.
Learn a bit about composition. Get into the habit of looking beyond the subject to see what might just spoil the shot ie. a plastic bag on the floor or a phone mast in the background, or some idiot who just happens to be in the way.
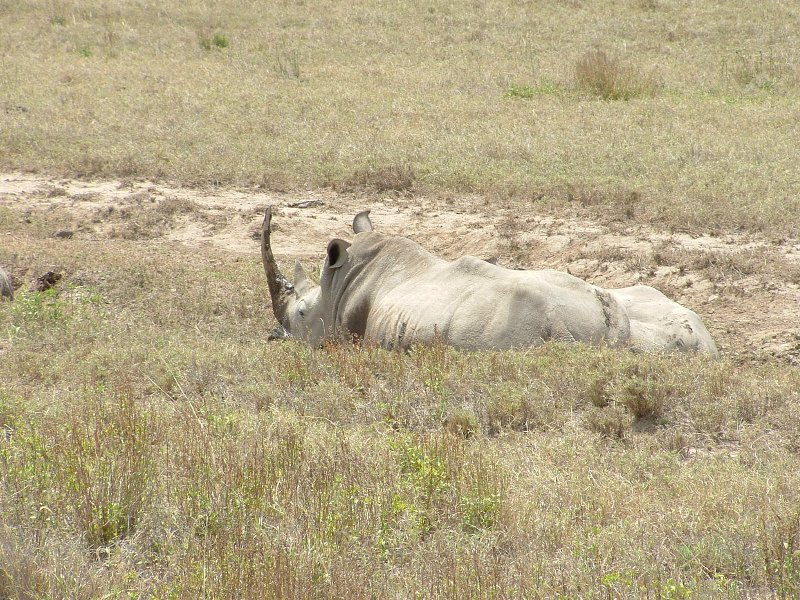
White rhino in Nakuru
When photographing Wildlife, don't do all 'in your face' closeups. They are great but they could be at your local Zoo and nobody would know. Get some background in a good few of them. It puts wildlife in context. Admittedly it's not so easy for small birds. If your subject is moving, give it a bit of space in the photo to move into. If your subject is an elephant or rhino, give it all the space it would like. When hanging out of the side of the car to photo cute Lion cubs, make sure that their Mother has had a good meal recently.
Normally my camera is set to aperture priority mode to give me control of depth of field and blurring of the background. See my page on aperture and exposure for more explanation.
See the light all the time. Think about the direction, the intensity, the shade, and the temperature of the ambient light. Move about a bit if it helps to make the light more advantageous to your photo.
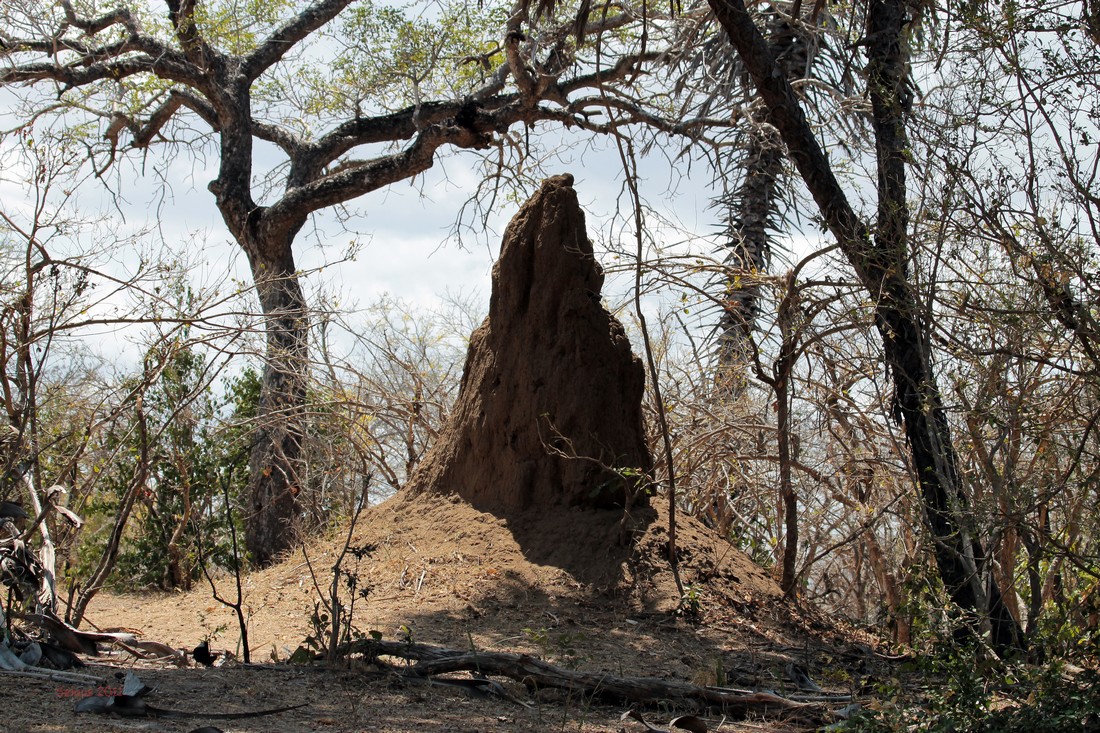
Roll your mouse over this photo.
The camera exposes for the whole scene,
which makes the detail of the termite mound
quite dark. Adding +1 2/3 exposure
compensation lights it up but blows out the
sky. Sometimes you have to decide which
you want.
The light meter is seeing everything in shades of grey. It would like the World to be a constant mid grey (18% grey, as it is known). It tries in effect to nudge the light in the photo towards that goal. At times it will over or underexpose your photo and you may need to manually compensate for it.
You can manually tweak the exposure - known as exposure compensation - by adding or subtracting an offset to the metered exposure.
One time where this is almost essential is when photographing birds in flight against a bright blue sky. Left to its own devices the camera will expose for the sky and the bird will almost be in silhouette. The solution is to add around 2-2 1/2 stops of light to the metered exposure. But remember to turn it off again when you finish - or have some preset parameters on a programmable button if your camera has one.
You may notice that a particular lens constantly seems to give slightly lighter or darker results than you'd like and so you can set the exposure compensation on the camera to add or subtract whatever you feel it needs to be to boost or reduce the brightness.
Stick to spot focus if it's on your camera. Spot focus will select a single focus point and stop the annoying habit where you found the focus latched onto one of the peripheral points ie. it was on a tree branch to one side and 10 ft in front of your subject, and was just enough to blur the image slightly and spoil the result. Use evaluative, or matrix metering for most shots unless the light is really exceptional, in which case look at Spot Metering or alternatively, exposure compensation as discussed earlier.
I try to keep shutter speed over 1/125 sec as a minimum when shooting handheld. More zoom needs a faster minimum. It has to be a very still day before I
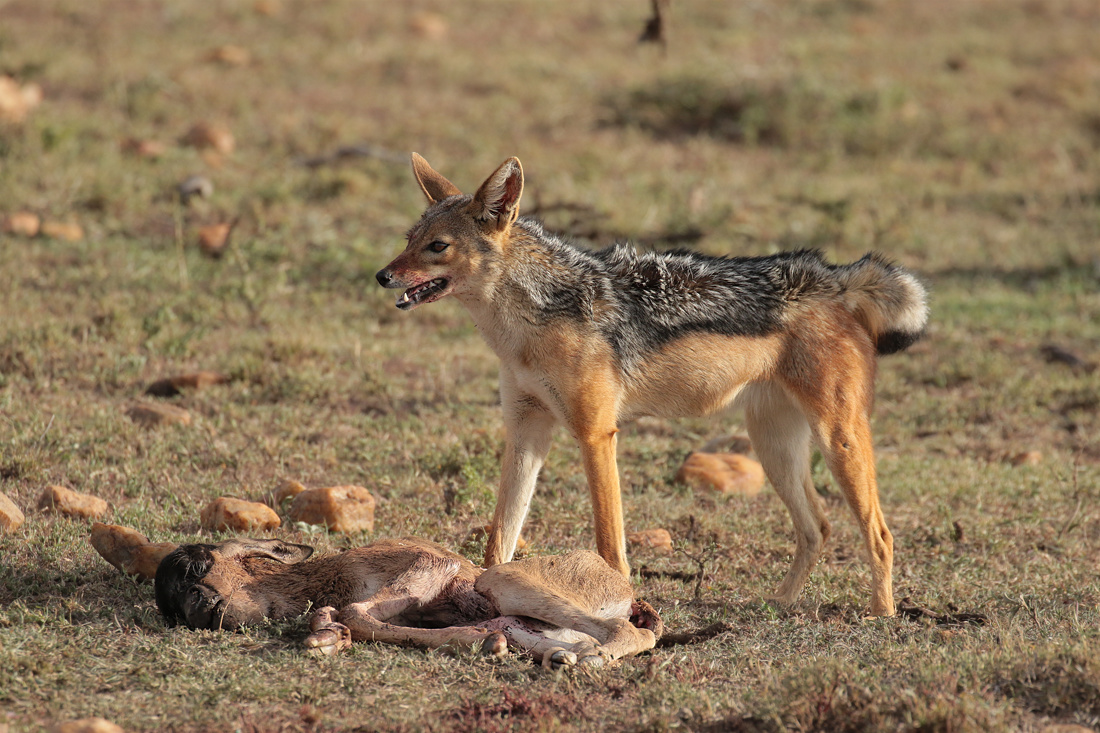
A stillborn wildebeeste is soon disposed of
drop lower unless I'm taking a landscape with a tripod. To freeze wildlife action I'm probably at 1/500 sec or more and will use the shutter priority setting on the camera and let it take care of the aperture.
One trick in low light is - don't be afraid to use your flash, especially 'off camera flash', if you posses a separate flash unit. This is worth its weight in gold btw. It can absolutely transform a picture providing the subject is within about 15 yards. It can also magically freeze the movement of an animal or water, or light up a tiny flower in the undergrowth. It's a whole subject on its own and worth reading up on.
A word of warning. Use of flash to add a bit of fill is ok during the day, but firing one off at night near big game is not a good idea. It can have unpredictable results and I for one wouldn't want to upset an elephant.
Check your camera settings between shots. Have a 'default' setting as a starting point. The settings I usually forget to check are the ISO, which governs the sensor sensitivity to light, and the white balance, which in effect sets the white point in the photo and so ensures the colours appear as they should.
Finally, Practise. Practise on your pets, your friends, and at your local park. I have hundreds of blurry pictures of my dogs from my early days. Now I'm glad to say that my keeper rate is much higher, and I made a lot of my mistakes when it didn't really matter. It's not a good time to mess it up when that leopard has just tackled an impala 20 metres in front of you.