Canon EOS 7D MK II
Canon EOS 60D
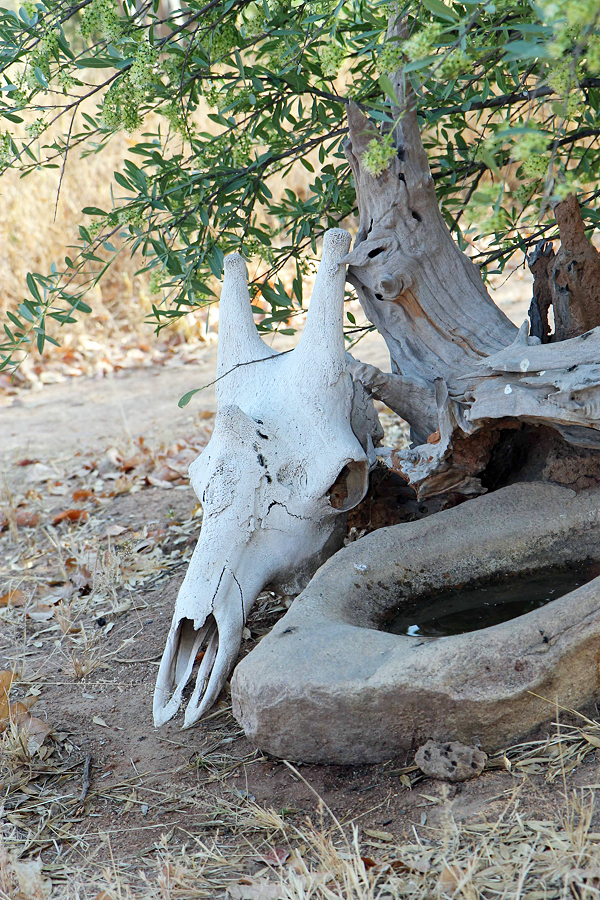
Taking this picture of a white giraffe skull on an overcast day removed the issues of possible blown highlights
Canon 100-400mm IS II USM L series lens for wildlife
Canon 24-105mm IS USM L series lens for everyday use
Canon 17-55mm F/2.8 IS USM lens for wide angle landscapes and low light use
Canon 10-18mm F/4.5 IS STM ultra wide angle lens for landscapes
On a sunny day it can be easier to get good results by putting the subject in the shade. But expose for the subject not the entire scene
Speedlite flash unit and a 1m chord for off camera flash (OCF) with ETTL metering capability.
Radio transceivers for OCF
Tripod and cable release for keeping it still
Cokin filters (square) and a holder. Various strengths of graduated neutral density filters are a must for landscape work.
Filters (round screw on), including polarizing, ultra violet and neutral density
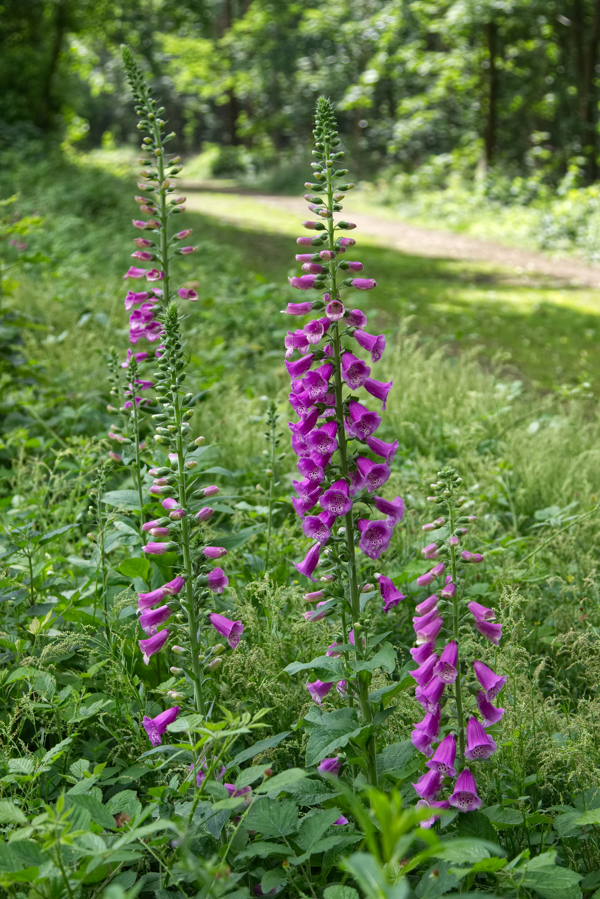
I slightly underexposed this scene to retain some blue colour in the sky
Spare batteries and SD Cards
Cleaning cloths and a small blower
LowePro 302 AW camera bag to stash it all in
Beware - the bag gets heavy after an hour or so. Often I cut back to the 'bare essentials' depending on what I'm doing
Opteka MCH-25 camera harness. This is a brilliant piece of kit and makes carrying a camera effortless and takes away neck ache

Giraffes lend themselves perfectly to portrait mode. This reticulated giraffe was spotted in Meru Kenya
Small HD video camera with a monopod to hold it on, even in the vehicle. It's extremely difficult to hold it steady with your arms outstretched
The video has a wind suppressor on the microphone

Sunsets can be tricky and generally require the camera to be set in manual mode and some experimentation with shutter speeds and white balance to get best results. It is especially difficult if you want to retain some detail in the foreground, rather than a silhouette. I cheat a bit and use post processing to help bring out the colours. Theforeground was almost black in the original photo
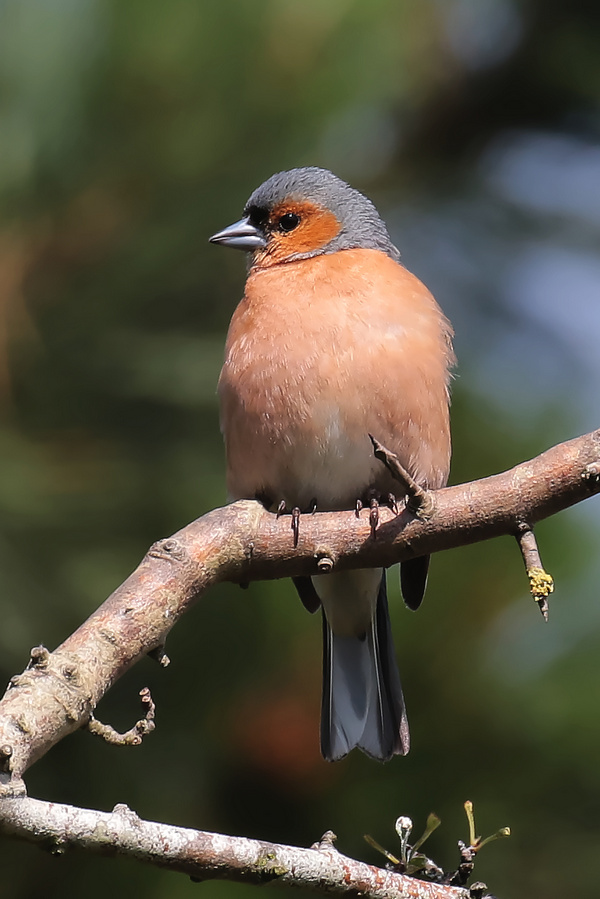
Avoid photography in the harsh mid day light they say. Why? This image was obtained on a very sunny day, and as long as the sun was in my rear hemisphere it helped greatly to bring out the colours on the chafffinch and to obtain a sharp focus. Don't waste all those available hours. The notion of bad light is humbug

Don't get all hung up if you haven't got the whole of the animal in the picture. Sometimes it can work well, as in this photo, where it cearly illustrates that the leopard is hiding, and also underscores its superb camouflage. The main point to note is that I have captured the eyes and so we retain some sort of connection with the animal
This page is really a discussion of techniques I use and problems I have to face while out shooting wildlife. These ideas are mainly aimed at safari photography but will apply most anywhere. ie. at the zoo, or on a nature walk close to home. It may give you some pointers as to what to expect in reality, as opposed to the textbook doctrines.
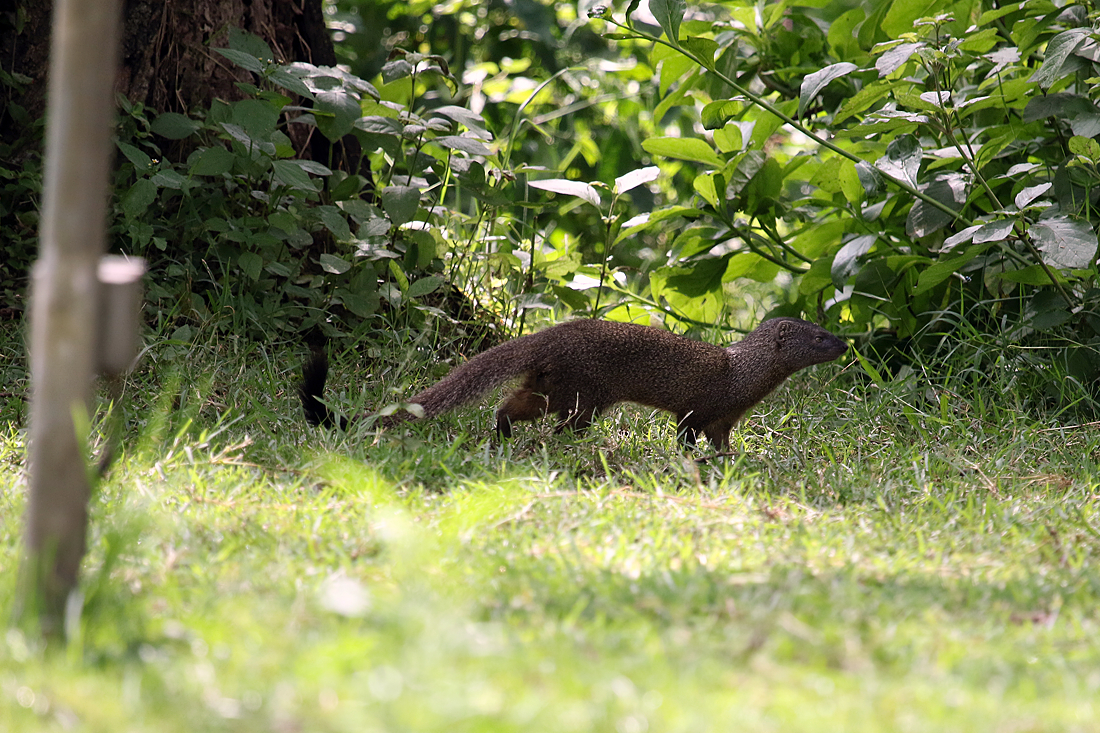
You don't always have to go far to find an
interesting subject. This slender mongoose
appeared in our hotel grounds as we were
sitting drinking coffee one morning. It pays
to always have a camera with you when you
are outdoors. I've missed a lot of good
opportunities by not sticking to this rule
Starting before you set off to take some photos it's always a good idea to know what exactly you are going to need rather than pack a massive bag, especially if your journey involves flights on small light aircraft where weight is restricted severely. Which camera(s) and lenses for instance. I have several cameras and lots of lenses but on a trip with known weight restrictions I take only two cameras and two lenses. The 100-400mm zoom is a given as in wildlife photography you can never have enough reach. I will probably take a 1.4x extender as well. The other lens I take is usually the 17-55mm for lovely wide and environmental shots.
I also rarely use a tripod on safari, so I take a lightweight travel tripod and leave the biggy at home. I can sometimes make up something akin to a bean bag to use as a rest when I'm in a vehicle but most of the time I'm shooting hand held. Motion blur, either from camera shake, or subject movement, is one of my biggest enemies and so I'm looking for the highest shutter speed I can get away with.
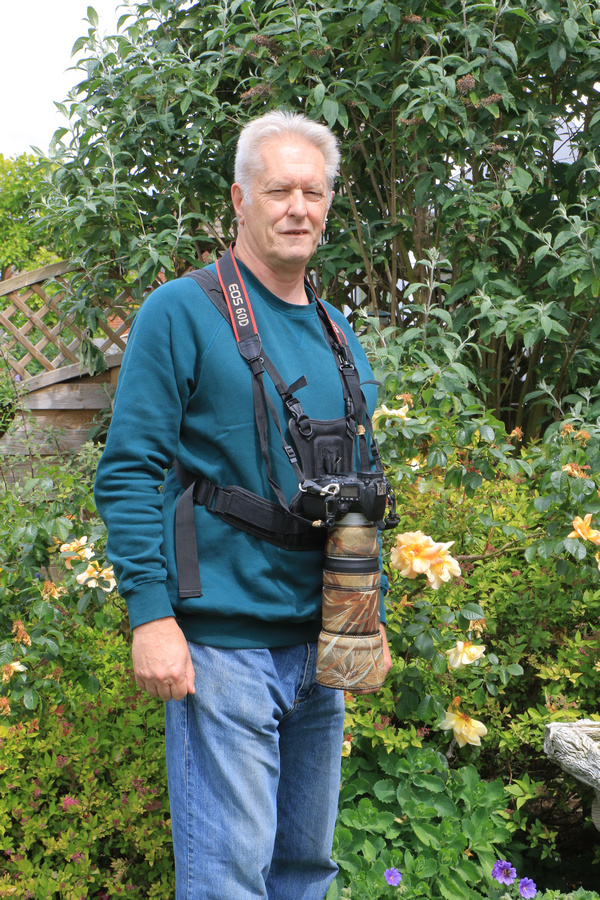
This is the harness I use when
walking. The camera has a small
attachment on its base which lets
it slip securely into the groove
on the front of the harness.
There is no weight on my neck
from the camera strap. It does
not need to be attached as there
are safety straps on the harness
If I'm vehicle based then the harness isn't needed either. Conversely, if I'm walking it is a must and I try to cut back to one camera with a spare lens in the backpack. If I know exactly what photos I'm taking I may even cut back to a smaller backpack that holds a lens, cleaner cloth, battery and a drink. I may however have more use for a tripod.
The reason I take two cameras on safari is that it means I don't have to keep changing lenses while out in the dusty areas like Meru. It keeps the dust out to a degree. I once had a bad time with my autofocus acting up on a trip when I was doing lens changes quite often. Sometimes the camera would not quite focus where I wanted it for an hour or so. Then it'd be all right for a while. Then act up again for no apparent reason. It was a couple of days before I realised that the contacts between lens and camera were getting dirty, and frequent lens changes weren't helping.
I always pack a small bottle of 'Deoxit' contact cleaner in my main backpack now.
One plea before you even start taking photos. Please turn off the annoying 'beep' that your camera makes when it locks focus. It absolutely drives me to distraction if I have to hear that sound several hundred times a day. It's just not needed and makes the owner look like a complete noddy.
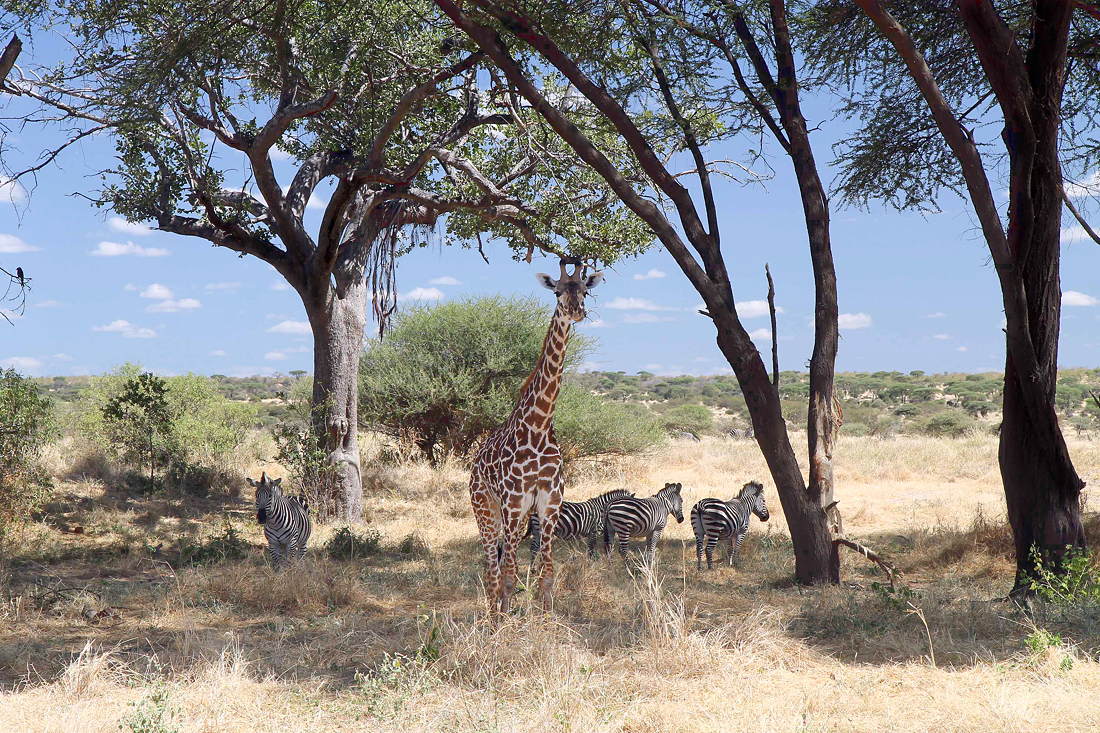
This image was taken at around 10:30 am.
The light was bright and shadows pronounced.
Despite not being 'photographers light' I
felt it was still quite well exposed and as we
were positioned with the sun more or less
behind us it gave no problems with the lighting
on the giraffe and zebras. Having them in the
shade of the trees actually made it easier
and the whites weren't burned out
Whilst it's always said that you should be up at the crack of dawn for the best light for photography and not bother around midday, you wouldn't want to waste several hours a day whilst on a time limited safari, or anywhere else in fact. Most of my photos are taken outside of optimium time for 'photographers light' and to me they are just fine. I'm not going to stop at 10am just because the light is getting harsh. I work with it as best I can. I use spot metering sometimes to get the light on the subject right, but mostly I use evaluative metering and then apply exposure compensation when I have to account for shade and bright light in the same frame.
Particularly with birds I find the brighter light later in the day actually brings out the colours more, and it also gives the advantage of being able to use higher shutter speeds to combat the aforementioned motion blur caused by camera shake, and/or lower ISO values for a less grainy photo.
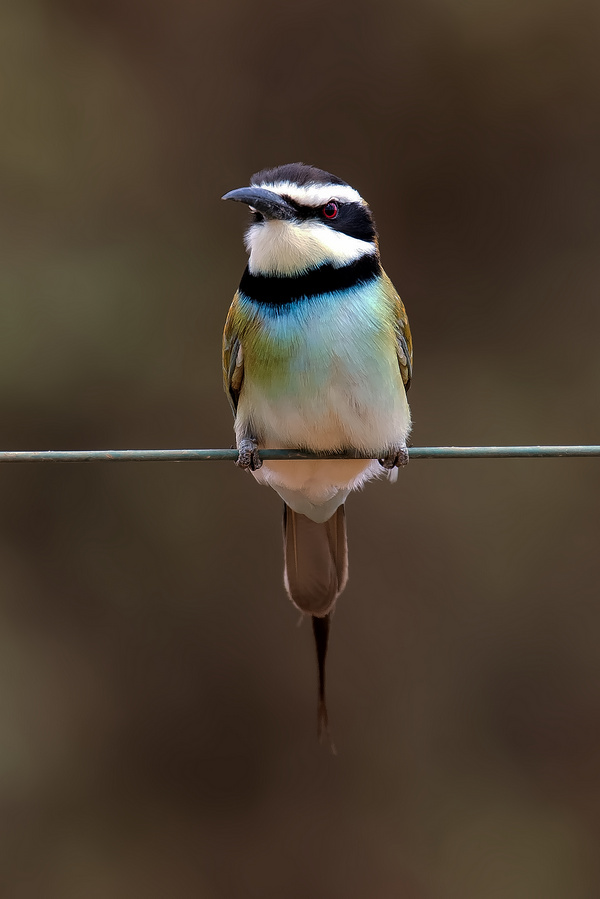
Roll your mouse over this photo of a little
white-throated bee-eater which was taken
at long range with a 400mm zoom. This meant
I would have to crop the image heavily and
switch to a frame in portrait mode to get a
reasonable finished photograpgh. A well
supported camera with three stops of image
stabilization meant I could use a shutter
speed of 1/400s and get a sharp image
(click for full sized edited photo)
This is especially important when I'm shooting small birds at 15 or 20 metres and I know I will need to crop the resulting image heavily to get the subject to fill the frame. Since any motion blur will show up even worse it is doubly important to try and eliminate it by selecting a high shutter speed.
Similarly, stronger light makes it easier to use smaller apertures for increased depth of field when trying to take environmental or wide angle shots. Pictures taken in strong daylight often have more potential for cropping and editing, such as really getting in tight on small birds without losing excessive amounts of sharpness or bringing out detail from the shadows.
When you do get a sighting, the first thing to do is get a quick shot 'in the bag'. To this end my camera has a couple of pre programmed settings and they are a good starting point. So get an initial shot and then you can start to get creative with your settings.
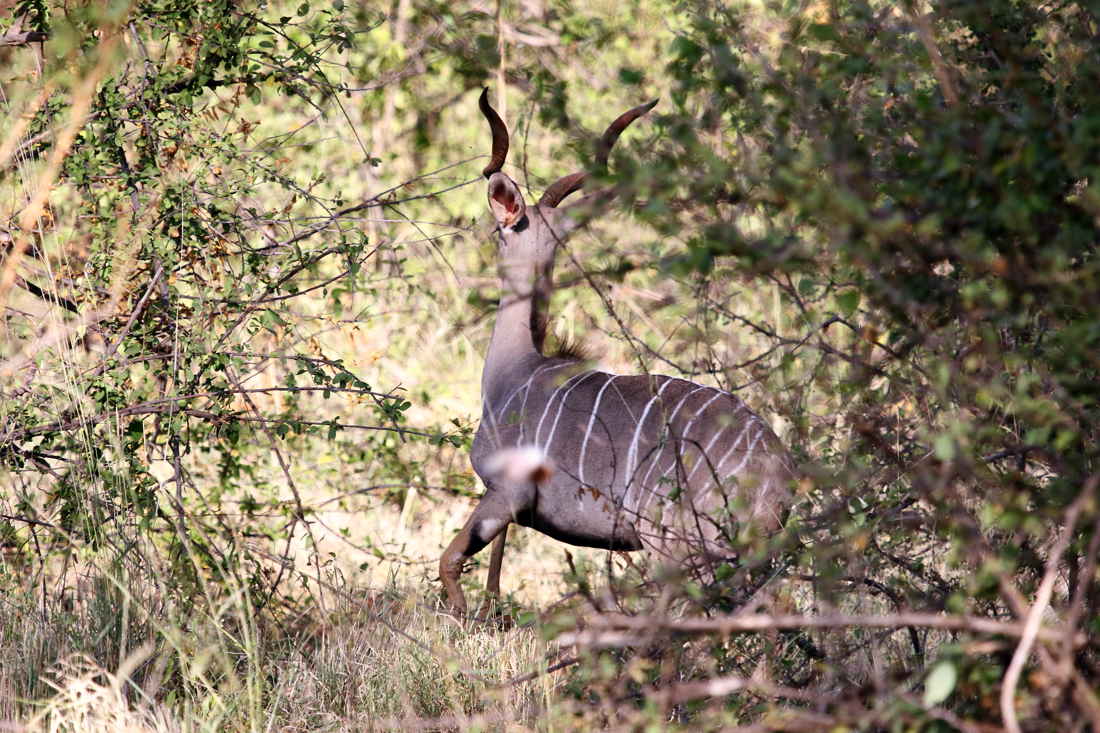
Roll your mouse over this photo of a lesser
kudu. Sometimes you only have seconds to
get a shot in before the animal flees. It's
best to have a set of go to parameters
programmed in if your camera allows it. If
not then check settings while you are walking
or riding and be ready
(click for full sized edited photo)
It often pays to use shutter priority for wildlife photography. One of my pre programmed modes is set to 1/1000s and is great when the light is good and strong. It is used in conjunction with ISO set to auto so that both aperture and ISO can be adjusted by the camera to maintain the desired shutter speed.
When I say get a shot, I actually take a fair few photos at this point. It maximizes the chances of getting a pin sharp shot free from motion blur when hand holding the camera.
Remember, animals don't pose, and often seem to take delight in turning their rear ends towards you. Very often they only stay in sight for a few seconds before dashing off into cover, and so it is essential to get those first shots quickly, and not mess about with settings. You need to try and get a good prior knowledge of your subject so that you have a chance of anticipating what it might do next. Expect a lot of failures though.
I always have my camera set to use AI servo mode for continous autofocus, except when doing landscapes, and it is normally set to high speed to enable me to take short bursts of two or three frames. I also always use Back Button Focus,
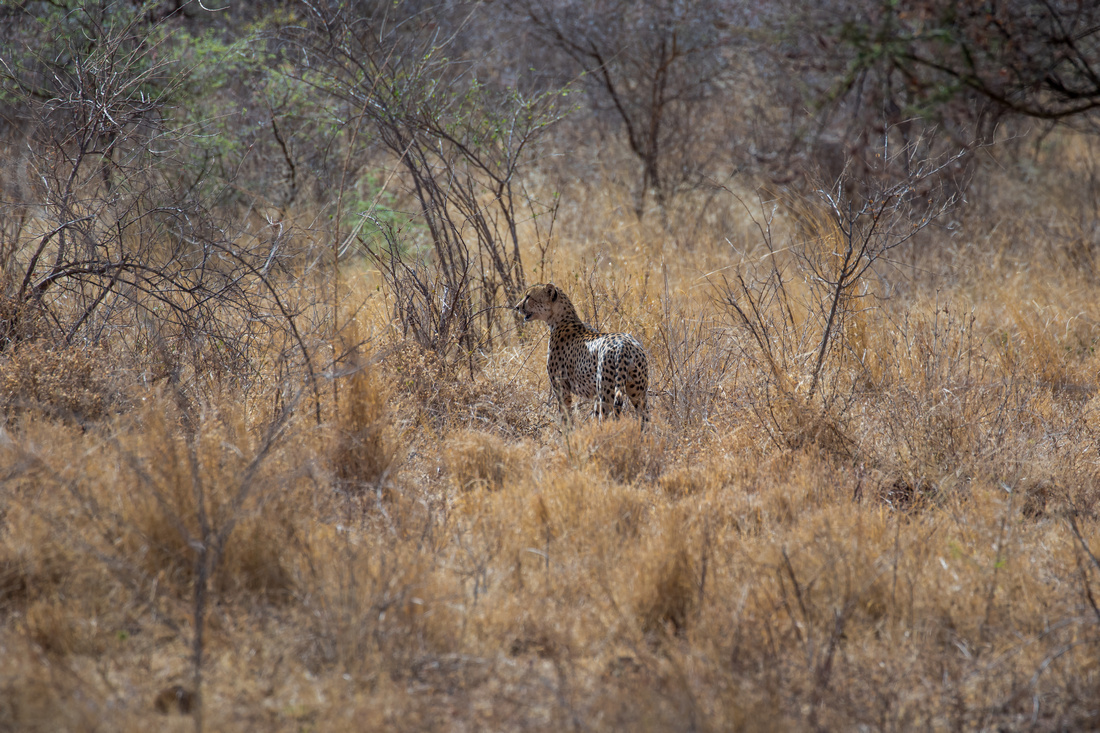
Roll your mouse over this photo of a cheetah.
This shot was overexposed by a full stop and
appears washed out and useless. But once it
was put through post processing all the missing
data was recovered and I had a good result.
More data is stored in the lighter end of an
image and so it is easier to recover than it is
from the shadows without including a lot of
noise. As long as the lights aren't pure white
you can try this recovery. Best attempted from
a RAW file as it has more information in it than
a JPG, which has already been processed in
camera, and some information will have been
discarded
(click for full sized edited photo)
so that once focus is acquired I can take my finger off the button and know that the focus won't revert to a nearby tree or twig if I want to recompose the picture slightly by moving the subject to one side in the frame. I can change the focus point on the camera here instead but I prefer to just lock focus and recompose. If the subject is moving I simply keep the BBF button pressed as I track the subject to maintain lock on whichever focus point I have chosen.
Once I have couple of 'safety shots' in the bag and the intitial excitement has calmed down, I will then start taking shots at different aperture values, or possibly lower my ISO to say 100 or 200, to see if I can get decent results with the slower shutter speeds, as these should be less grainy. Then try deliberately over exposing some images by +1/3 or 2/3 of a stop to try and capture more detail in the lighter end of the image. I know that a lot of detail can then be recovered in post processing, even if the image on camera looks washed out. This is known as 'Expose to the right' or ETTR and is well known technique used by a lot of professionals.
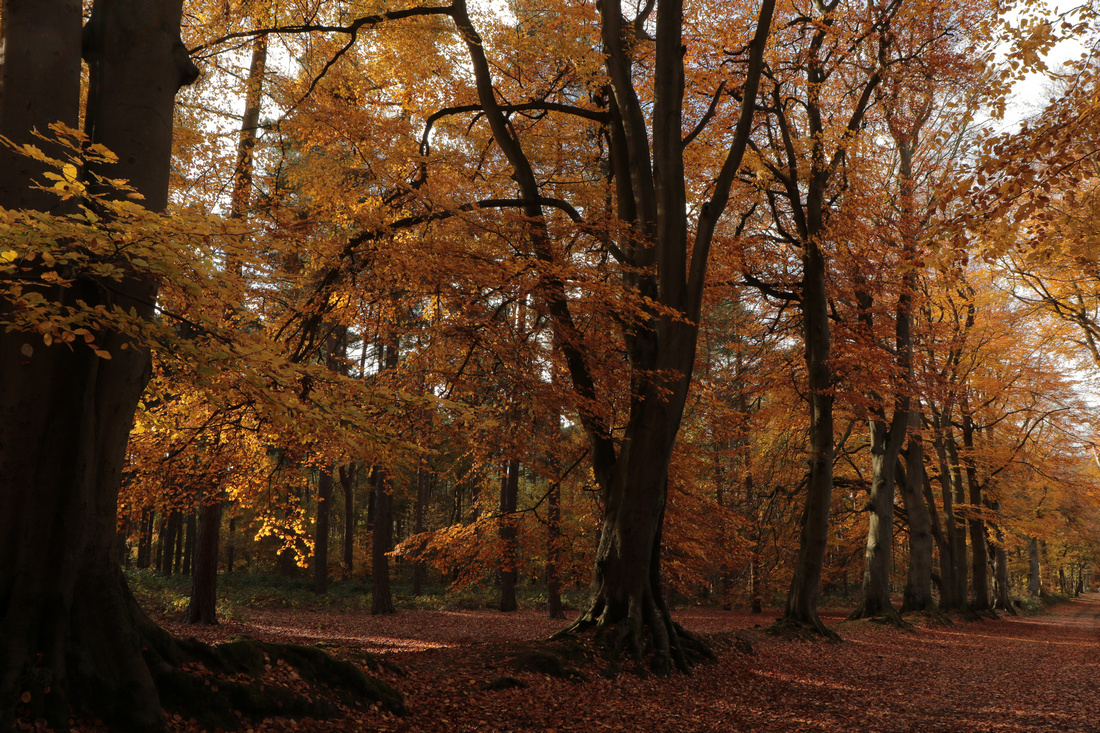
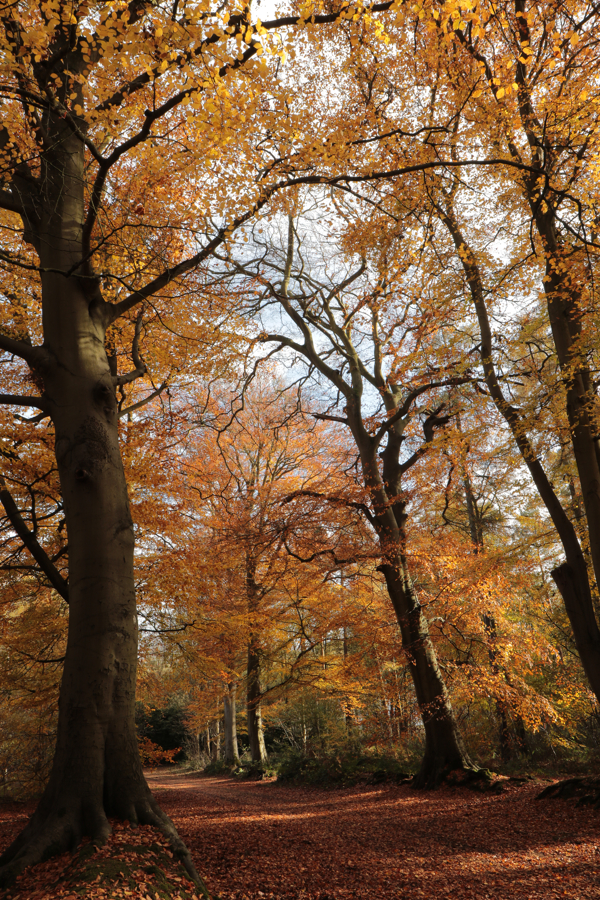
Roll your mouse over this photo of these
beech trees taken in November. I had the
camera set in full manual mode, and by varying
the shutter speed only, as I did not want to
change the depth of field, I was able to
alter the colouring and look of the photo quite
dramatically. There is no right and wrong; it
would depend on my intent as to which one I
picked to show
(click for full sized edited photo)
I will consider my aperture settings and think about whether the background would be best blurred or would the story I'm depicting benefit from a clear background.
I take some shots in portrait mode, expecially tall stuff like trees or subjects with a lot of verticals in them.
Basically try anything you like if you have time. It's your camera to do what you like with and you may come up with a surprisingly good image by being creative. Failures are good to learn from and can always be deleted. If anyone tells you that you are doing it wrong or you should be doing something else, and you haven't solicited their advice, I'd suggest showing them the finger.
In fast changing lighting conditions try using manual settings for shutter speed and aperture and set ISO to auto. The camera will adjust the ISO to allow for changing light. If at this stage you want to compensate for shooting into shadows or out into bright light because you don't agree with the camera's choice, you can do this by programming a button to allow you to adjust the EV setting (See screenshots from back of camera below). This allows you to use the equivalent of exposure compensation in manual mode, with auto ISO.
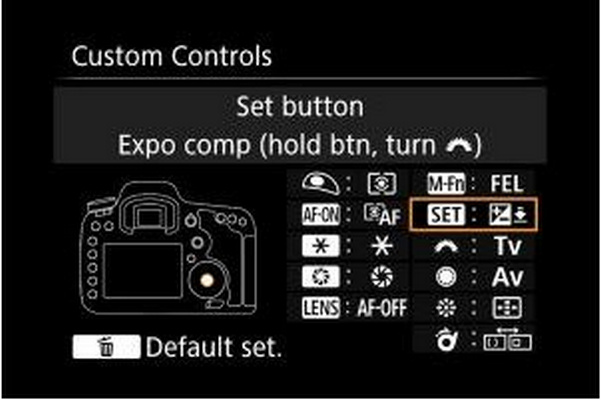
In custom controls I select the SET
button to allow exposure compensation to be
assigned to it (On a Canon). Other makes
are similar
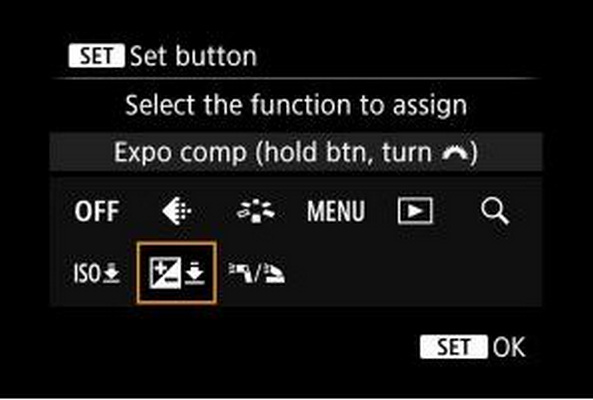
Next I select the exposure compensation
function and assign it. Now if I press the
SET button I can use the top dial to change
the exposure compensation
Or just stick to aperture priority or shutter priority modes and let the the camera do the worrying. Either way is valid depending on what you like to do.
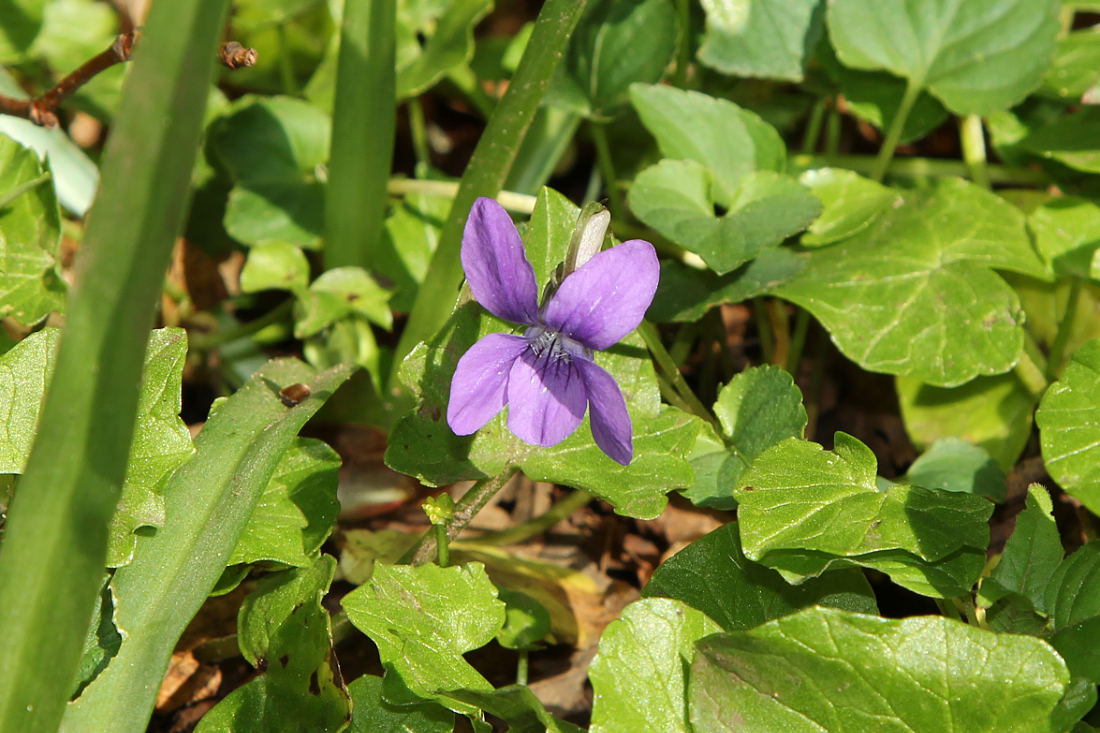
I used a little bit of fill flash to bring out
the colours in this woodland violet. With an
off camera flash the direction of the light
could be varied to give the best effect. In
this case it was coming from over my right
shoulder
I don't use the flash much at all for fill light in the day. I'm not sure how big game would be affected by it. I have used an external 50gn flash at night when shooting small stuff like mongooses, combined with a high ISO of around 3200 and a long 400mm lens to get illumination up to 30 metres or so away. No way would would I fire this at a lion or an elephant though, their reaction might be spectacular in the worst possible way.
I have found that using a lens hood means that for the majority of time I have no need for a UV filter on the lens, which I used primarily to protect the glass. There are some hazy conditions where you may need this filter however, but its not often.
Polarizing filters can make spectacular differences to colours in landscape shots. I'm all for leaving one on my second camera with the shorter lens. It's less useful on the long zoom though, especially as it cuts out a couple of stops of light and so further limits the camera in Shutter priority mode ie. contributes to a wider aperture or higher ISO being needed.
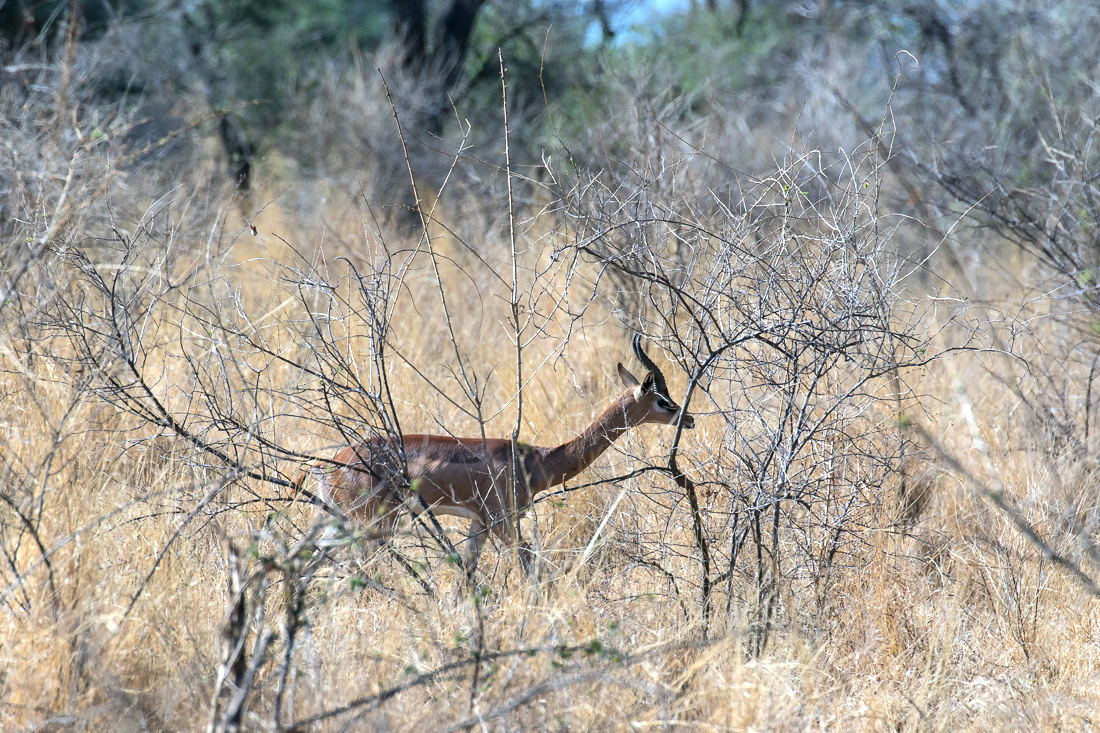
Low contrast subjects are particularly hard
to lock focus on. With a moving subject it's not
practical to use manual focus. I try to lock on
to the eye or at least the most contrasting
area and then release the BBF as it moves
(if it is moving across the frame and there
are twigs in the way,) and take bursts of
photos, then refocus in a clear patch and try
again. If the foreground is clear I keep the BBF
button pressed and as I'm in AI servo mode
anyway the camera continually refocuses and I
just keep shooting. Some of the images will come
out sharp. The same applies if it's moving
towards or away from me
Some animals and birds have a lot of contrast in their colouring ie. giraffes, zebras, sunbirds, and these are always going to be easier to focus on. Some however such as gerenuks and various drab birds are much harder for the lens to get a good sharp focus on. The fact that they are camouflaged to blend in with their background does not help. Leaves and branches between subject and camera are a further complication.
Here I definately want to take more photos, and may try using multiple focus points instead of normal single point if there are no twigs in the way, and also stop down the lens a bit if possible to increase the depth of field. I can't guarantee what will and won't work; some days it's just massively frustrating.
A good way to get a lot of small birds is to sit around in camp, or at the lodge, for a while, especially if there are lots of trees. The birds are often a lot more habituated to people and so will allow me to approach a little closer, or will come to me anyway.
Whatever I do, I am primarily out to enjoy the whole experience of where I am. I try to use some of my images to give a sense of the mood or atmosphere of my surroundings. I want my wildlife and nature photos to reflect the environment as I see it. I want to show the incredible diversity and beauty within natural systems on our lovely planet.